Create a specific page layout
Imagine that we want to create a specific layout for a Services page. For this page, we need to add a list of services to the top and give the client the possibility of setting the rest of the page’s layout using snippets.
Inside your_views_folder, create apages.xmlfile and add the default Odoo markup. Inside<data>create a<template>tag, set thepageattribute toTrueand add your code into it.
<?xml version="1.0" encoding="utf-8" ?>
<odoo>
<data>
<!-- === Services Page === -->
<template name="Services page" id="website.services" page="True">
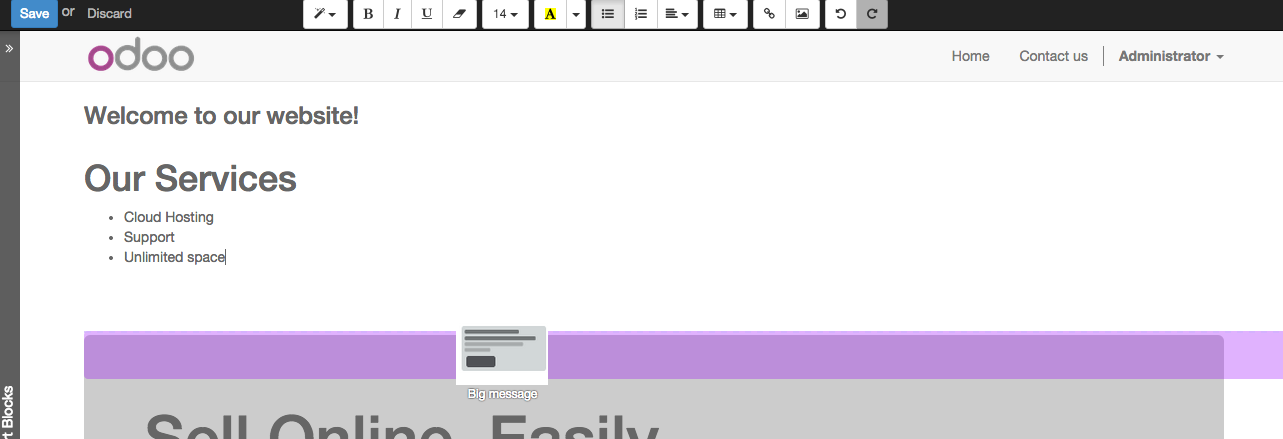
<h1>Our Services</h1>
<ul class="services">
<li>Cloud Hosting</li>
<li>Support</li>
<li>Unlimited space</li>
</ul>
</template>
</data>
</odoo>
The page title will be the template ID. In our caseServices(fromwebsite.services)
We successfully created a new page layout, but we haven't told the systemhow to use it. To do that, we can useQWeb. Wrap the html code into a<t>tag, like in this example.
<!-- === Services Page === -->
<template name="Services page" id="website.services" page="True">
  <t t-call="website.layout">
    <div id="wrap">
      <div class="container">
        <h1>Our Services</h1>
        <ul class="services">
          <li>Cloud Hosting</li>
          <li>Support</li>
          <li>Unlimited space</li>
        </ul>
      </div>
    </div>
  </t>
</template>
Using<t t-call="website.layout">we will extend the Odoo default page layout with our code.
As you can see, we wrapped our code into two<div>, one with IDwrapand the other one with classcontainer. This is to provide a minimal layout.
The next step is to add an empty area that the user can fill with snippets. To achieve this, just create adivwithoe_structureclass just before closing thediv#wrapelement.
<?xml version="1.0" encoding="utf-8" ?>
<odoo>
  <data>
    <!-- === Services Page === -->
    <template name="Services page" id="website.services" page="True">
      <t t-call="website.layout">
       <div id="wrap">
         <div class="container">
           <h1>Our Services</h1>
           <ul class="services">
             <li>Cloud Hosting</li>
             <li>Support</li>
             <li>Unlimited space</li>
           </ul>
           <!-- === Snippets' area === -->
           <div class="oe_structure" />
         </div>
       </div>
      </t>
    </template>
  </data>
</odoo>
Tip
You can create as many snippet areas as you like and place them anywhere in your pages.
Our page is almost ready. Now all we have to do is addpages.xmlin our__manifest__.pyfile
'data': [
  'views/layout.xml',
  'views/pages.xml'
],
Update your theme
Great, our Services page is ready and you’ll be able to access it by navigating to/yourwebsite/page/services.
You will notice that it's possible to drag/drop snippets underneath the_Our Services_list.
This code will add a link to the main menu.
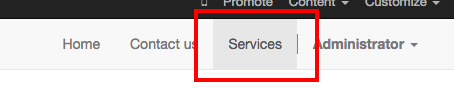
Thesequenceattribute defines the link’s position in the top menu. In our example, we set the value to99in order to place it last. I you want to place it in a particular position, you have to replace the value according to your needs.
As you can see inspecting the_data.xml_file in thewebsitemodule, theHomelink is set to10and theContactus one is set to60by default. If, for example, you want to place your link in themiddle, you can set your link’s sequence value to40.